
Guide to Pickling Vegetables
Pickling is likely one of the easiest ways to preserve fresh produce. This process has been used as a means of food preservation for over 4,000 years going back to the time of the ancient Mesopotamians. Food was pickled and used for long journeys especially by sea.
The term pickle is derived from the Dutch word “pekel” or the northern German word “pokel” meaning salt or brine, which are two components important to the process. These days in the U.S. and Canada the word “pickle” almost exclusively refers to pickled cucumbers. However, the end product of any food that is preserved by a pickling process is referred to as a “pickle”.
Pickling preserves food by anaerobic (without oxygen) fermentation. Consequently, this is typically done in either a salt brine or in vinegar. The brine creates an acidic environment which inhibits the growth of bacteria. Consequently the food does not need to be completely sterile.
In addition to vinegar there are often a variety of herbs and spices that are used in the process. Many recipes simply use a combination of dill, garlic, cloves, peppercorns, cinnamon, and salt.
There truly is an infinite variety of recipes for pickling. Because of this you can preserve almost anything. It is possible to pickle food for refrigeration only, which means it has to be consumed within a reasonable amount of time. However, a canning process is required in order to store pickled foods for a longer period of time especially at room temperature. Just about any fresh fruit and vegetable, even eggs, fish, and meat are suitable for pickling. However, in this guide I am only going to focus on vegetables.
Pickling is one of the easiest means of preserving food. The basic process is essentially the same no matter what you are trying to preserve.
TABLE OF CONTENTS
1) TOOLS AND SUPPLIES NEEDED
2) THE BASIC PICKLING PROCESS
3) TIPS FOR SUCCESSFUL PICKLING
4) HOW TO QUICK PICKLE ANY VEGETABLE
5) COMMON PICKLING PROBLEMS AND MISTAKES
6) FIVE EASY PICKLING RECIPES
7) ADDITIONAL REFERENCES
8) ADDITIONAL POSTS OF INTEREST
Tools and Supplies Needed

Unless you are familiar with processing your own food, pickling may seem like a complicated process. However, with a few simple tools and supplies before long you will be a pickling pro. The necessary tools and equipment are simple.
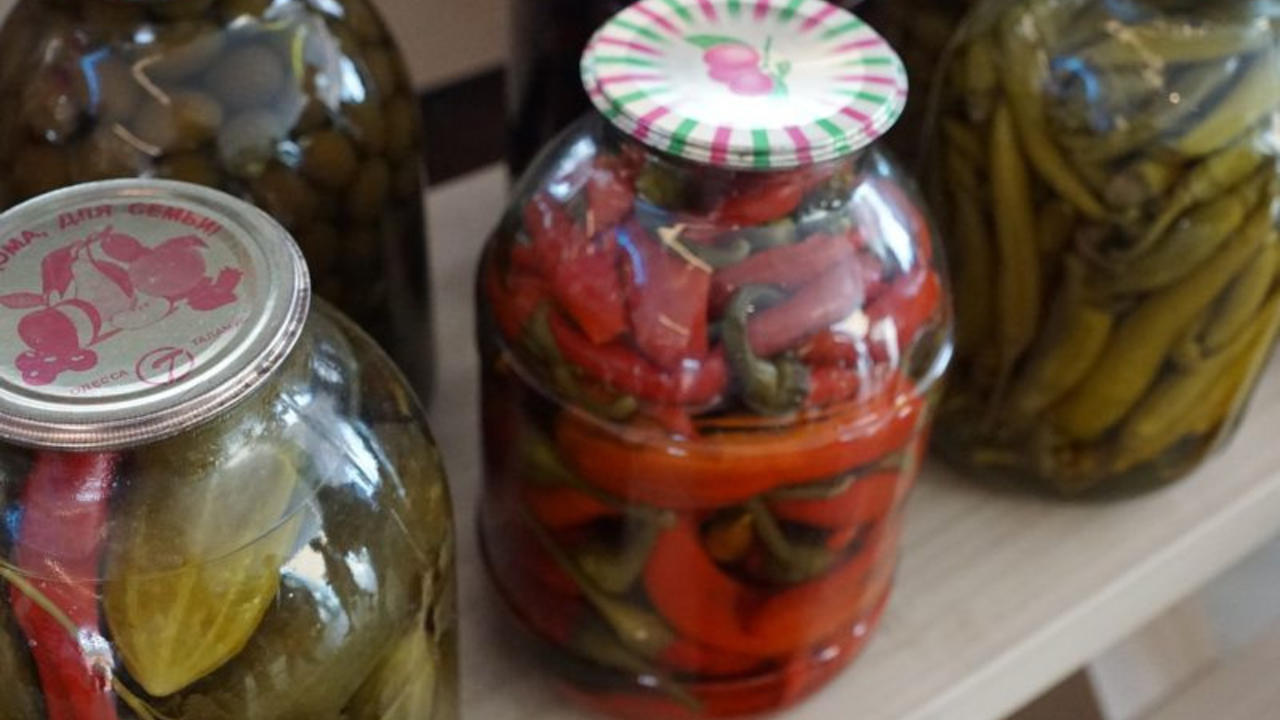
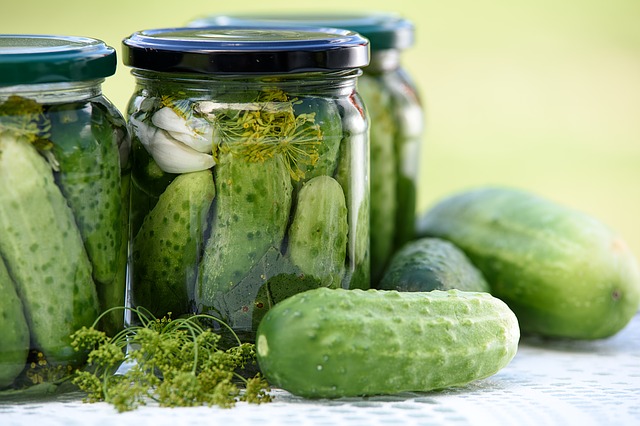
1) Jars: Air tight glass jars are best. Canning jars are perfect for pickling and they are inexpensive.
2) Vinegar: There are multiple types of vinegar used for pickling. Truly it is a matter of personal taste. Vinegars that are acceptable for pickling include apple cider vinegar, rice wine vinegar, distilled white vinegar, and white wine vinegar.
3) Salt: There are literally 12 different types of salt. For pickling, the best thing to do is avoid salt with any sort of additives. Sea salt is packed with valuable vitamins and minerals. Kosher salt and Himalayan salt are good choices. Pickling salt is made specifically for canning or pickling.
4) Sugar: A small amount of sugar is needed to balance the flavors. Although white sugar is most commonly used, any type of sugar is acceptable. Try different types in order to change up the flavors.
5) Water: Purified water is always best. However, tap water is perfectly fine.
6) Herbs and spices: The most common ingredients used are dill, garlic, onion, cloves, peppercorns, cinnamon and salt. However, there is an infinite variety of other herbs and spices that work well such as coriander seeds, mustard seeds, bay leaves, red pepper, allspice, and chilis.
7) Produce: The options here are endless. Most people start with cucumbers because it is very easy and a great way to gain experience. However, you can pickle almost anything, including watermelon rinds.
The Basic Pickling Process
1) Preparation
Always start with fresh fruits and vegetables. Wash and clean them thoroughly.
2) Blanching

Some of the tougher vegetables such as beets, carrots, green beans, okra, and peppers require blanching. If the veggies need to be blanched just follow the instructions in the recipe. Blanching helps to reduce or stop the activity of the natural enzymes in foods that result in faster degradation. Thus giving vegetables a longer shelf life. Blanching also helps to retain the natural flavors.
Two Ways to Blanch Vegetables
- Steam Blanching
Use a large pot with a tight fitting lid. Fill with 1 to 2 inches of water. Use a colander, wire basket, or sieve to hold the vegetables. The produce should not contact the boiling water. Bring the water to a boil and then place the vegetables in the pot.
Once finished, place the vegetables in cold water long enough to stop the cooking process. Do not cool them to room temperature unless you are doing a quick pickle.
- Water blanching
Use a large pot with a tight fitting lid. Fill about 2/3 full of water and bring to a boil. Fully immerse the vegetables in the water for the recommended time. Remove and place in cold water.
3) Packing the jars

Lots of pickling recipes call for pint sized jars. However, quart jars are even better. Regardless of the size of the jar, the veggies need to be cut down to a size that will fit into whatever pickling jar you use. They can be cut into discs, spears, or smaller ones can be left whole. Packed the jars full but leave some space for the brine to circulate. Also leave some head room at the top of the jar to make sure the veggies are completely submerged in the brine.
4) Add the desired flavorings
The benefit to pickling is that there is an infinite variety of spices that can be used to vary the flavor. Here are a couple of tasty examples.
Dry Flavorings (amount per pint jar):
1 Bay leaf
1/2 teaspoon Celery seed
1-3 small whole dried Chile peppers
1/2 teaspoon Mustard seed
1/2 teaspoon Pickling spice
1/2 teaspoon Turmeric
1/2 teaspoon Cumin seed
1/2 teaspoon Dill seed
Fresh Flavorings (amount per pint jar):
1 fresh Habanero or Jalapeño pepper
2-4 sprigs sliced or whole dill
1/2-1 large clove of garlic, sliced
2 , 3-inch strips fresh, peeled Horseradish or 1/2 teaspoon prepared Horseradish
1 sprig fresh Oregano
5) Make your brine
The brine is usually a mixture of vinegar and salt. Simply follow the recipe. Here are a couple of examples of different brines.
Sour Brine
3 cups distilled white vinegar or cider vinegar
3 cups of water
2 1/2 tablespoons of sea salt
2 tablespoons sugar
Bring to a boil until the salt is dissolved and then boil 2 more minutes. Makes 6 cups of brine
Sweet Pickle Brine
3 cups of distilled white vinegar or cider vinegar
3 cups of water
1 1/2 cups of sugar
1 tablespoon plus 1 teaspoon of sea salt
Bring liquid to a boil and then allow to boil for two minutes. Makes 6 cups.
6) Pour the brine into the jars packed with vegetables or whatever product you are pickling. Be sure to completely submerge the produce with the brine. Never pour boiling brine into cool jars. Cool the brine to slightly above room temperature.
7) Cool and refrigerate. If this is a quick pickle recipe cool the product to room temperature and refrigerate.
8) Canning. If the recipes calls for canning, then process according to the recipe. Store at room temperature after processing.
Tips for Successful Pickling

- Always use fresh produce. Inspect carefully for any bruising, damage, or any signs of spoilage.
- Clean the produce well. Make certain it is free from any obvious dirt.
- Use the correct type of salt. Pickling, kosher, or sea salt is best. Table salt has additives such as iodine and anti-caking compounds that can produce undesirable results.
- Follow the recipe. This will ensure you have consistent results.
- Measure ingredients carefully. Being cavalier about measuring ingredients will at the least give you inconsistent results. It may also produce an undesirable end product.
- Use commercially prepared vinegar. These vinegars have 5% acidity. This is what is needed to properly pickle.
- Use a white distilled vinegar when a light color is desired such as with fruits or cauliflower.
- Use a blend of herbs and spices. Adding extras to the brine, such as peppercorns, mustard seed, bay leaves, mint, and basil, gives a lot of extra flavor.
- Use the proper jars. Do not be tempted to reuse jars from other food products. They may not seal properly. Canning jars are inexpensive and reusable.
- Follow proper canning techniques. Keep things sterile and clean. Process foods for the recommended amount of time. Always use new lids when reusing a jar.
- Proper storage. Always store home canned goods in a cool, dark place and away from direct sunlight.
- Wait 2 to 3 weeks before consuming. This is a matter of personal choice. The flavor of pickled products improves with age.
- Diluting the vinegar. Do not do this unless the recipes calls for it. Some vegetables, such as onions, need the higher acidity to pickle properly.
- Using hard water for processing. Hard water will sometimes discolor your product due to the presence of minerals. To soften the water, boil it then allow it to sit for 24 hours. Skim off any deposits. You can also use distilled water.
- Use of food grade lime. This ingredients is used to firm up pickles. Do not use lime unless the recipes calls for it. If used, the produce needs to be rinsed thoroughly. However, there are better ways to produce firm pickles without using lime.
- Label and date your end product. Proper rotation is important for safety reasons and to prevent waste. Always date your home canned food. The rule of thumb is first in first out.
How to Quick Pickle Any Vegetable

When you mention “pickle” most people immediately think of the classic cucumber pickle. However, any pickled vegetable is correctly referred to as a “pickle”. “Quick pickles” refers to produce that is pickled without the canning process. These are also known as refrigerator pickles. The end product has to be stored in the refrigerator and will last 2 to 3 months.
The best part of quick pickles is that it is easy to do in small batches, typically one or two pints or quarts at a time.
Equipment
- 2 pint jars
- Cutting board
- Knife for chopping
Ingredients
- 1 to 1/4 pounds fresh vegetables.
- 1 1/4 cup white or apple cider vinegar
- 1 1/4 cup water
- 1 tablespoon of white granulated sugar
- 1 tablespoon of kosher salt or 2 teaspoon pickling salt
- 2 to 4 cloves of garlic depending on your personal preference
- 1 to 2 teaspoons of spices such as peppercorns, mustard seeds, coriander
- 2 sprigs of fresh dill. You can also use thyme, basil, rosemary, as well as others.
- 1 teaspoon of dried herbs of your choice
Instructions for Processing

- Wash and clean all utensils, including the jars and lids. Use hot soapy water. Allow to dry.
- Wash and dry all vegetables. Cut off stems. Cut vegetables to size as needed to fit into the jars.
- Add spices to the jars. Evenly distribute the herbs and spices of your choice into the jars.
- Pack the jars. Pack the vegetables tightly. Leave 1/2 inch head room (space at the top of the jar) for brine to completely cover the vegetables. Remember that some of the tougher vegetables will need to be blanched prior to processing.
- Make the brine. Place water, vinegar, salt, and sugar into a pot and slowly bring to a boil until the dry ingredients are dissolved.
- Cool the brine. Allow the brine to cool down to just above room temperature. You do not want to pour boiling brine directly into cold jars.
- Remove excess air bubbles. Use a plastic or wooden utensil to move the vegetables around in the jar to remove excess air bubbles.
- Seal the jars. Wipe the rims of the jars with a clean cloth and seal with the rings and lids.
- Cool and refrigerate. Cool the jars to room temperature and refrigerate.
- Wait for it. Allow the veggies to sit for at least 48 hours, preferably a week. The flavor improves with time so try to be patient.
- Storage. These can be stored in the refrigerator for about 2 months. If you put these through a canning process, they can be stored without refrigeration.
Common Pickling Problems and Mistakes

Using too much sugar: Pickling brine should have a little bit of a sharp taste. Some recipes call for as much as 1/4 cup of sugar per pint jar. There are many health benefits to processing your own food and reducing the sugar content is one of them. Unless you prefer pickled vegetables in syrup, then back off on the sugar.
Not using enough water. If vinegar was the only liquid content to your brine, the taste would be very sharp. It is important to balance that by using water and a small amount of sugar.
Using table salt. Table salt has added iodine and anti-caking additives. These can cause cloudiness and discoloration. Pickling salt does not have these additives. Additionally its fine texture means it dissolves easier. Sea salt and Kosher salt also work well.
Not measuring ingredients carefully. If you want to consistently make great pickles, then follow the recipe carefully. Do not be cavalier with measuring ingredients. There is nothing worse than pouring in the brine and figuring out you do not have enough.
Pickling everything together. Different vegetables pickle at different rates. Consequently if you mix things together you will not have consistent results. Some veggies, such as red onions, will also bleed color onto the other produce. That said, one of my favorite recipes is pickling a mixture of jalapeños, white onions, and carrots together. I like the flavor. But, each of these ingredients ends up with a completely different texture.
Using the wrong type of cucumber. There are several varieties of cucumbers. The common variety seen in the supermarket are typically for snacking and for salads. Using these to make pickles will result in a very soft pickle. It is far better to use the smaller cucumbers that are very firm.
Not enough time in the brine. Allowing your pickled products to sit for the recommended time actually improves the flavor. Eating them too soon often means a bitter flavor. Letting them sit too long usually means they go limp. Taste as you go and you will end up with a perfect pickle.
Soft pickles. There are a number of reasons for this including the following: Brine is too weak, over cooking during canning, pickles stored at too high of a temperature, over ripe produce used, using the wrong type of cucumber. Additionally, the blossom on the end of the cucumber contains an enzyme that causes softening. Remove the blossom and about 1/16 of an inch off of the end.
Cloudiness and color. The most common cause of this is using the wrong type of salt. Table salt contains additives that can cause cloudiness. Also, if you made the brine in a metal pot, the acidity of the brine can react with the metal causing cloudiness. However, the pickles are still safe to eat. Cloudiness can also be a sign of spoilage. If in doubt, throw it out.
Dark or discolored pickles. Using brass, copper, or zinc utensils can cause this. In which case, you cannot eat the pickles. Additionally, the minerals in hard water can cause discoloration. Another cause is using ground spices for processing.
Pickles are hollow. This could be the result from improper curing or not using fresh fruit. Using cucumbers that are too large will also result in a hollow pickle.
Shriveled pickles. Not using fresh fruit. Using a brine that is too strong, too sweet, or using very strong vinegar. Over cooking or over processing.
White coating on the pickles. This is usually the result of using salt with anti-caking ingredients. It is better to use pickling salt, kosher salt, or sea salt.
Cloves of garlic that turn green, bluish green, or purple after pickling. This can be the result of iron, tin, or aluminum in your cooking pot, or water supply. Immature garlic bulbs sometimes have more of a purplish color. This can be corrected by using mature garlic bulbs, distilled water, and using high quality cookware such as stainless steel, glass, or ceramic lined without any cracks.
Use of plastics for pickling. If you use plastic, it has to be food grade. Keep in mind that plastic is damaged very easily. The scraps, cuts, and dings could potentially harbor harmful bacteria. It is far better to use a stone crock or glass.
Use of firming agents to increase crispness of pickles. Firming agents such as alum are no longer recommended. It does not increase the firmness of quick process pickles. Adding a grape leaf to the pickling jar will accomplish the same thing. However, by using fresh produce and following proper technique firming agents are not necessary.
Using homemade vinegars for pickling. Pickling is a very safe process if done properly. Proper technique results in producing an acidic environment that inhibits the growth of harmful bacteria. The problem with homemade vinegars is that the acidity is unknown. Consequently, using them for pickling may result in an unsafe product. It is better to use theses vinegars for salads. For pickling it is far safer to use commercially prepared vinegars of known acidity.
Five Easy Pickling Recipes

1) Dilly Beans
These are a great snack to keep around and they are simple to make.
Yield
2 pint jars
Ingredients
- 2 heads of fresh dill
- 2 hot peppers
- 2 cloves garlic, peeled
- 1/2 teaspoon cayenne pepper
- 1/2 teaspoon mustard seed
- 1 pound of fresh green beans
- 1 1/2 cups water
- 1 cup cider vinegar
- 2 tablespoon of pickling salt.
Preparation
- Sterilize 2 pint canning jars
- In each jar place 1 head of dill, 1 hot pepper, 1 garlic clove, and 1/4 teaspoon of cayenne pepper.
- Pack beans in jars in an up right position
- Bring the remaining ingredients to a boil. Stir to make sure the salt is well dissolved.
- Pour brine over jars
- Seal and process for 15 minutes in a boiling hot water bath canner
2) Quick Pickle Red Onions

These are a nice, crunchy treat and are also great on burgers or in salads.
Yield
2 pints
Ingredients
- 2 large red onions, peeled and sliced
- 1 1/4 cup water
- 1/2 cup white vinegar
- 1/2 cup apple cider vinegar
- 2 tablespoons white granulated sugar
- 3 teaspoon pickling salt
- 1/2 teaspoon red pepper flakes, or more depending on personal preference.
Preparation
- Thinly slice the onions
- Pack onions in the pint jars
- Mix all other ingredients and make sure the sugar and salt are well dissolved. You may need to slightly heat the brine.
- Pour the brine over the onions.
- Seal in jars a refrigerate for at least 24 hours prior to consuming.
3) Quick pickled Cucumbers (Refrigerator pickles)
Yield
One pint jar
Ingredients
This recipe is incredibly simple and makes great pickles. This makes one pint of pickles so adjust the quantities accordingly.
- 3 pickling cucumbers, each about 4 inches longs
- 1/4 cup Vidalia onion, sliced
- 3 to 5 sprigs of fresh dill weed
- 1/2 to 3/4 cup apple cider vinegar
- 1/2 water
- 2 cloves garlic, crushed
- 1 1/2 teaspoon pickling salt or kosher salt
- 1/4 teaspoon granulated sugar
- 1/4 teaspoon whole black peppercorns
- 1/4 teaspoon whole yellow mustard seed
- Pinch of crushed red pepper flakes, or to taste
Preparation
Pack a clean pint jar with sliced cucumber, onion, and dill. Leave about 1/2 inch head space.
In a small sauce pan, add water vinegar, and all other ingredients. Heat slowly to a simmer.
Cool until warm. Pour in jars enough to cover all of the contents. Seal jars and refrigerate for 24 hours before consuming. Can be stored for up to 2 months.
4) Pickled carrots, either quick pickle or canned

Ingredients
- 1 1/2 pounds of carrots, either baby carrots or peeled and sliced carrots sticks
- a cup white vinegar
- 1 cup water
- 1 tablespoon of pickling salt or kosher salt
- 1 teaspoon dill seed
- 1/2 teaspoon of black peppercorns
- 2 to 4 cloves of garlic based on personal preference
- 1 teaspoon crushed red pepper flakes (optional)
Preparation
- Wash, clean, and dry two 1 pint jars. If these are going to be a quick pickle then they do not need to be sterilized. If these are going to be canned, processing time is only 10 minutes so the jars need to be boiled for 10 minutes to sterilize.
- Bring a small pot of water to boil for blanching the carrots.
- Peel and slice carrots into sticks. If using baby carrots, skip this step. Once the water is boiling, drop the carrots into the water. If these are going to be canned, cook them for 90 seconds. If they are going to be a quick pickle, blanch for 3 minutes.
- When blanching time is complete, remove the carrots from the hot water and run them under cold water in order to stop the cooking process
- Combine water, vinegar, and salt in a small sauce pan and bring to a boil. Make sure the salt is well dissolved.
- Evenly divide the garlic, peppercorns, and other spices into the jars.
- Pack carrots into the jars leaving 1/2 inch of head space.
- Pour the brine over the carrots.
- Wipe the rims of the jars clean.
- Seal the jars with lids and rims.
- If these are quick pickles, cool the jars to room temperature before refrigerating.
- If these are going to be canned, place them into a boiling hot water bath canner and process for 10 minutes. After processing, these can be stored at room temperature.
5) Pickled Cauliflower, carrots, and red bell pepper
This recipe is tasty along side grilled meats. But you can also serve them with flat bread, olives, and humus.
Yield
3 pint jars
Ingredients
- 1/2 head of cauliflower, cut into 1 1/2 inch florets, about 4 cups
- 5 to 6 medium carrots, peeled, sliced length wise, about 2 cups
- 1/2 red bell pepper, sliced into large pieces, about 1 cup
- 1/2 small yellow onion, thinly sliced
- 6 medium cloves of garlic, peeled and crushed
- 1/4 to 1/2 cup sugar, depends on personal taste
- 2 tablespoons kosher salt
- 1 teaspoon coriander seeds
- 1 teaspoon of brown or yellow whole mustard seed
- 1/2 teaspoon cumin seeds
- 1 teaspoon black peppercorns
- 1/2 teaspoon ground turmeric
- 1/4 teaspoon crushed red pepper flakes
- 2 sliced of fresh ginger, about 1/4 inch thick
- 2 cups cider vinegar
- 1 cup water
Preparation
- Place coriander, mustard, and cumin seeds in a small sauce pan. Toast these spices over medium heat until slightly darkened and fragrant. (Alternatively, these spices can be boiled with the brine for 1 to 2 minutes.)
- Place all of the other spices and ingredients into the brine except the carrots, cauliflower, and bell pepper. Bring the brine to a boil.
- For quick pickles, place the vegetables in a heat resistant glass bowl. Pour the hot brine over the vegetables and allow to cool to room temperature. Pack into jars and refrigerate for at least 2 days prior to consumption.
- For canned pickles, pack the vegetables into sterilized pint jars. Pour the hot brine over the vegetables. Wipe the rims of the jars clean. Seal with lids and bands. Process in a hot water bath canner for 10 minutes. Store for 1 to 2 weeks prior to consumption.
As you can see, pickling is one of the easiest forms of food preservation. If this has peaked your interest, then check out these additional references.
Additional References
The USDA has an excellent guide on Preparing and Canning Fermented Foods and Pickled Vegetables.
The Old Farmer’s Almanac also has a Beginner’s Guide to Pickling
Additional Posts of Interest
Go off grid and live well,
Patrick
Stay connected with us to receive regular updates.
Join our mailing list to receive the latest news and updates from our team. We always respect your privacy. Your information will never be shared.
Patrick

Sustainable Living Expert
Author
Having grown up with 2 working farms in the family, I was active outside from a young age. I have lived off the grid for over 20 years and still going strong. I would love to teach you the skills of sustainable living and all else that is needed for you to be secure in managing your own resources.
Get regular updates and exciting new articles.

